Tuesday, March 13, 2007

New goodies

I quit my job at Michaels today, and she asked me to stay on a bit longer for a few things, and so I agreed to do so. Mainly for the discount, honestly...but I love my boss there and I love working with her! It was a hard decision to make, but I think I made the right choice since re-enactment season is coming up and I am getting promoted at my regular job! Yeah!

Anyway. I had to go back to Michaels tonight because I realised I was completely out of MonoAdhesive roller and I needed it to finish the invitations to my mom's 50th birthday party next month. I will post those when they are completely done and up tommorrow!

So I was one of those rude idiots on the phone the whole time while I was shopping for adhesive, wandered a bit and ended up with this handful of pretties. I love the ribbon, but I was restraining myself because I am taking a trip to Toronto this weekend and so want to hit the bead shops on Queen Street...save money, more beads. Yeah!

I made a decision about these little clear stamps and the blocks. I am going to buy up a bunch of the stamps and the blocks, a black ink pad, stamp scrubber and cleaner, and a box of plain, pre-made cards and put them all in a nice basket for my BFF. I'm getting her hooked, slowly and surely....that might just put her over the edge. Maybe....*evil grin*

Monday, March 12, 2007

Stamp Club

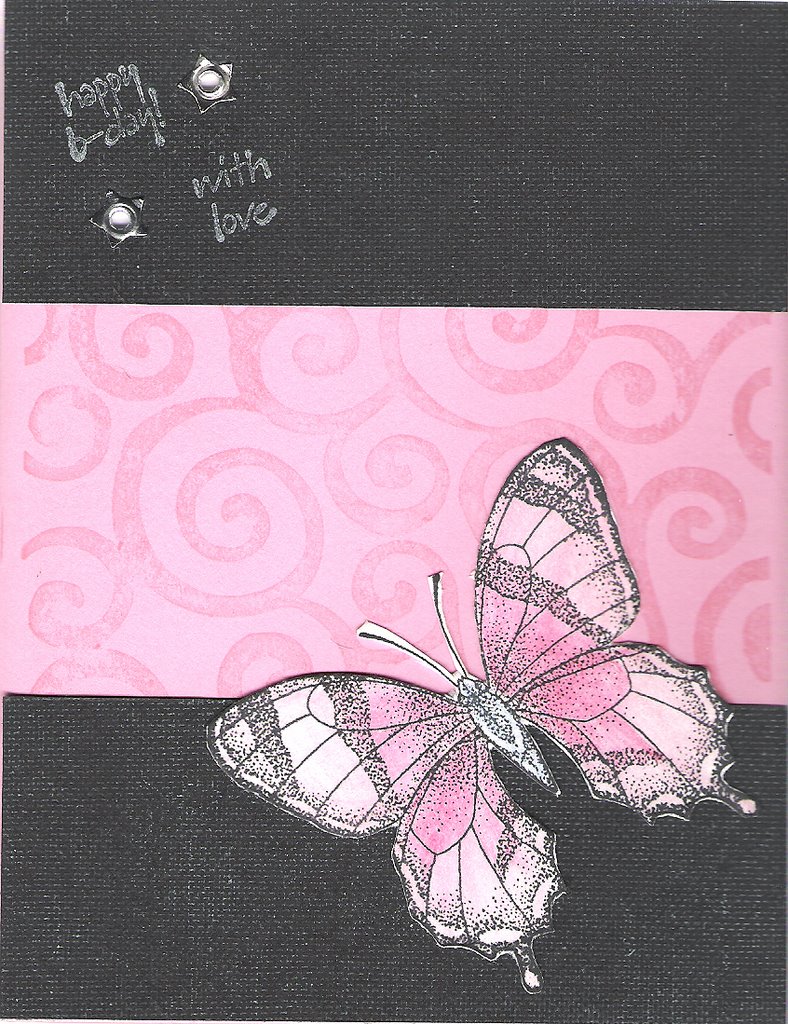
CS: Confetti White CS, Green Galore (I think....), Glossy White. Ink: Versamark, spectrum pad. Accessories: Clear EP, white organdy ribbon. Stamps: butterfly of Happiness, SU!

So this was my first brayering experience and my first time trying the Joseph's Coat technique. I am a little brayer illiterate! And spectrum pad illiterate.....ah well. Despite the fact that we did not have an embossing buddy, I think this turned out well!

First we inked up the brayer with the spectrum pad and rolled it over the glossy cardstock. Let it dry, it didnt take long, then stamped the butterflies with versamark and powdered them with clear EP and heated it up. Then I brayered a dark blue (I can't remember the color, I'm sorry!) over that and buffed the ink off of the flutterbyes. Then embellish! I think that was how it went....I hope.....:D

Wednesday, March 07, 2007

Best Fishes

All schtuff by Stampin' Up! Paper/Ink: Certainly Celery, Tempting Turquois, Cool Carribean, Whisper White. Stamps: Very Punny, Art is Life, Linen BG. Mini Brads by Spare Parts.

Right, so I needed to make a card for my granparents anniversary this Friday (51 years and still strong) and this is what I came up with. I used Laura's Color Combo Site to come up with this combo, but I am not sure how I feel about it yet. I found the layout on SCS a while back, but honestly, I can't remember which sketch challenge it was!

Stamped Linen BG with Certainly Celery on the CC CS and sponged the edges with the same ink. Tied the Celery organdy ribbon around the Tempting Turquoise CS and glued it down. I felt that the Cool Carribean panels needed some oompf so I stamped CC on the CS with the rough stamp from Art of Life...insta oompf!

Stamped the fishes from Very Punny with Basic Black on Whisper White then watercolored with a Niji Aquabrush and pad ink. Punched out with a one inch circle punch and glued the whole shebang down! Nifty, eh?


Wednesday, February 28, 2007

Sketch Challenge 111

I know it is a little late, but I have not had alot of time to blog, let alone stamp anything interesting. I did, however, just finish up teaching a session (9 weeks) of card making and stamping to 6 MRDD adults, so I should be able to start having some more free time. Yay!


Sketch Challenge 111. Supplies: All SU!, except the ribbon is from the wedding aisle at Michael's. Paper: Ballet Blue, Bashful Blue, Whisper White. Ink: Ballet Blue, Bashful Blue, Brocade Blue. Accessories: Ribbon, Sakura Clear Stardust pen.


I like it...simple and clean, and probably the last card this season that I will make with my 'borrowed' (ie: stolen from the stamping box that my friend has left at my apartment for over a YEAR! That should be termed wreckless abandonment and means the stamps are mine, right? *grin*)....unless of course it snows again....


By the way, I found the COOLEST ribbon at Michael's this week. It's all spooled on wooden spools....velvet, stitched, and stripes. Oh it's yummy! I plan on buying some up this week and will post it as soon as I do!


Also....I saw a new line of papers and scrapbooks called "Once Upon A Time" Wow....glitter and bling and soft fairytale prettiness....*sighs contently* I so need some of this....and an idea to scrapbook with it!


Monday, February 26, 2007

I agree....

http://paper-and-ink.blogspot.com/2007/02/stampers-neurosis.html

Sums up how I feel nicely. Don't think I could have put it so elquetly though.

Sunday, February 18, 2007

Toronto and the Pirate Pub Night

Just literally got back from Toronto, Ontario Canada....exhausted. Here is a pic from the Pirate Pub Night that we went to....it was to raise money for the second annual Pirate Festival that is held at Fort York over Labor Day Weekend! We are so going....because Michael won free passes for being the 'best dressed' pirate there!

Had a great time though. Dissapointed that I came home and my new Bellas were not here yet! Ah well, maybe tommorrow!

Thursday, February 15, 2007

No card....but ICE!

I'm back at work today after two days off due to ice and snow (I don't think the folks in this town could honestly handle more than 6 inches of snow without freaking out about the "white death"....as one of my Canadian patients calls it....)......annnyyyyyywayyyyyyy...


We had a little drama this morning. First, the door wouldn't open because the entire side of the building is a solid 1.5" of ice. Well then. That doesn't make it very easy to get to work, does it?!?!


The door is just a little back from that, but I thought that shot was neat! How did we get in the office? A little bit of force and the clever use of a shovel handle....basically, take aim, thwack, hope you don't break the glass. It worked well.

My boss is out front as we speak using a sledgehammer to chip the ice off of the sidewalk so that none of our patients fall and kill themselves...funny how he pays someone to do these things for him and he is still out there doing them himself. Hum.

Then....this happens:

I heard this strange ticking sound and suddenly a gush of water came pouring into the waiting room...of course. Melting ice. Perfect! So the wall is saturated and ruined, carpet is soaked and it is still pouring in. We called the co-owner of the building (he built the joint and co-owns it with my boss) and two hours later, he is still not here.

I like to try and think of it as zen....it's calming. It's relaxing. I am one with the universe.

I am one with the universe and I have to pee.

Wednesday, February 14, 2007

I hate Valentine's day, but.....

I made this card for DBF anyway. Stamps: A Light Heart-Stampin' Up!, Paper:Basic Grey Blush, Stampin' Up! Very Vanilla and Chocolate Chip, and Bazill Basics pink, Ribbon:Pink grosgrain-Michael's Crafts, Brads: Making Memories mini silver brads.

It was easy really. Make the card base out of Bazill Basics pink CS, adhere the Basic Grey Blush line patterned paper to the front of the card. I used mini glue dots to adhere the ribbon on. Then I stamped the Love stamp from A Light Heart onto Very Vanilla CS, cut an oval out of chocolate chip and mounted them together. Then I mounted the oval over the ribbon with dimensionals.

It needed something! So I added the three little brads in the corner to balance it out.

I still don't like Valentine's Day, but I love him so I made this card, baked a Chocolate Chip French Silk cake, and made him a steak dinner. I must be in Luuuuuuuuuuuuuvvvvvveeeee.

Tuesday, February 13, 2007

CC101B

All supplies by Stampin' Up!: Happy Harmony SAB set, Linen BG, celery ribbon, Certainly Celery CS and ink, Cranberry Crisp CS and ink, So Saffron CS and ink. Giga scallop oval punch by Marvy Uchida.

Pretty self-explanatory...but....I used the So Saffron ink and stamped the Linen BG onto So Saffron CS. I added the ribbon and tied the knot before mounting it onto the Cranberry Crisp. I punched a circle of Certainly Celery CS and cut a smaller oval with a Coluzzle out of Very Vanila and stamped the flowers from Happy Harmony on it and inked the edges. It needed something, so I added the sentiment in Cranberry Crisp ink in the corner!


Image: Lockhart Stamp Company, Marvy Uchida Giga Scalloped Oval punch, Pretty in Pink CS by Stampin' Up!, Sentiment Stampin' Up! Simplay Said, Colorbox Fluid Chalk ink in Chestnut Roan.

Well I ordered the punch from Ellen H.'s store on Saturday evening and it was in my mailbox yesterday! Along with it was a thank you note stamped with Lockhart's Rosebud gown on Fabriano paper. I used the Coluzzle and cut out the image, then mounted it on a Pretty In Pink scalloped oval, then mounted it on a Fabriano reply notecard and stamped the sentiment in chalk ink. Easy peasy? Right?

Friday, February 09, 2007

CC100

I know that most of you have seen CC100 by now, but I really liked it and wanted to share it again...

Stamps: Stampin' Up! Delight In Life - Sellabration 2007 set.

Paper: Stampin' Up! Cool Carribean, Chocolate Chip.

Ink: Stampin' Up! Cool Carribean, Chocolate Chip, Blush Blossom.

Accessories: Coluzzle oval template, mini glue dots, Niji Aqua Brush, Sakura clear Stardust pen, Tombow Mono Multi.

Well I didn't win the big CC100 prize, because I was too lazy and laid on the couch too long before getting up to do the challenge! That's alright, I plan on making that AWESOME color challenge book myself (CASE'd heavily....but there is no way it will be as gorgeous as the one Leigh made!) along with a sketch challenge book of a similar nature! Wouldn't that just ROCK?!

The base of the card is Cool Carribean and I layered a piece of Chocolate Chip over top that I had cut using my new Coluzzle for the very first time! I stamped the sentiment in Cool Carribean and added that little swirly gig for a bit of flourish.

The flowers were stamped on Very Vanilla cardstock and watercolored using re-inker and a Niji Water Brush (from TAC or Michaels-about $8). I used a Stampin' Up! marker to color Blush Blossom in the centers of the flower, the accented with the Sakura clear Stardust pen.

If you don't have one of these Sakura clear Stardust pens....you so totally need one. I got mine from StarLitStudios on eBay. I have seen them at Joann's, but once you visit the StarLitStudios store, Joann's is just kinda a waste of time!

Thursday, February 08, 2007

Not an Owl Post....

But a cute little mailbox!

Ok let's take care of the business end of things first. I cannot get Blogger to work on my laptop at home....AT ALL! Every time I try to sign in, I get booted right back to the sign in page. Michael is going to try and fix this problem this evening, so hopefully I will be able to get back to some more regular posting. I love to post, really! I have SO much to share (alot of it non-stamping related....but stuff I love anyway!) and I would like to get back to it. I can use his laptop...but all my stuff is on mine, UKWIM!?! Moving on...

I never found the Target mailboxes but I did find this larger mailbox in the seasonal aisle at the local grocery store and purchased it instead.


Supplies:

Paper-Basic Grey's Blush line (Lovin' it!), Bazzil Basics textured paper(I don't remember the color, I just grabbed it at Archivers cause it matched!). S

tamps- Stampin' Up! Carte Postale.

Ink- Stampin' Up! Chocolate Chip, Timber Brown Stazon.

Accessories- ribbon from Michaels, Marvy Uchida Mega Scalloped Square Punch, Stampin' Up! Large and Small Oval punches.

Adhesive-Mod Podge Matte adhesive, Tombow Mono Multi.

It was actuallt pretty simple to assemble. I cut a sheet of the Basic Grey paper the size of the mailbox and wrapped it around and dented the spots where holes needed to be cut. Cut the holes, Mod Podged the paper down then added the strips of plain colored paper as accents and as well on the front. The rest was cake! Stamp, punch, ink, glue....add ribbon and VIOLA!! Cute little mailbox!

I did a OSW (which, bad Faerey....I forgot to photograph.) and made 10 valentines cards with matching envies and stuffed them inside. I gave this to my mother as a gift and she LOVES it. Her best friend conned me into making a bunch more which she sold to teachers at school, which is awesome!

Anyway. Will try and post again soon....gotta get that computer glitch fixed soon!

Saturday, February 03, 2007

Problems

I'm having problems accessing blogger, all. I am using DBF's computer right at the moment, so until I can get it working on my laptop again, there won't be too much updating going on. Hopfully he can fix it soon! I have alot to update and share with you all!!!!!

New projects and stuff! Promise that I will get it fixed soon!

Thanks for your patience!

Tuesday, January 23, 2007

I've Been Tagged!!!

I was tagged by Dawn!

A-Available or Taken: Taken by a darling Canadian
B-Best Friend: Jen T. She's been my best friend forever...boys are stupid, throw rocks at them.
C-Cake or Pie: Cake, but only if it's by Tailor Made Cakes
D-Drink of Choice: Hot tea with cream and sugar
E-Essential Item You Use Everyday: I use my computer everyday
F-Favorite Color: Pink
G-Gummy Bears or Worms: Worms....definately worms...
H-Hometown: Beckley, West Virginia
I-Indulgence: I let myself buy something frivolous once or twice a month....today, its going to be stamps....Stamp Club tonight!
J-January or February: February...because it is one step closer to spring than January.
K-Kids and Names: I don't have kids, I have cats Tonks, Chloe, and Cosette
L-Life is Incomplete Without: Friends and Family
M-Marriage Date: I'm not married, in fact, I get my final divorce papers tommorrow!
N-Number of Siblings: 1- Nicholas
O-Oranges or Apples: Oranges. They're easier for me to eat than apples....unless they're cut up.
P-Phobias or Fears: Spiders....and Aliens. Don't ask.
Q-Favorite Quote:"A woman is like a teabag, you never know how strong she is going to be untill she gets into hot water" Eleanor Roosevelt
R-Reason to Smile: There is always a reason to smile, some people just choose not to.
S-Season: Fall
T-Tag 3 or 4 people: Michael, Jen, Kim
U-Unknown fact about me: I sing opera
V-Vegetable you don't like: Brussel sprouts...I've never tried them, but they just look and smell icky.
W-Worst Habit: Biting my nails....even though they're acrylic!
X-Xrays: I've had several since I work for a Chiropractor....2 sets for each car accident and two on my hand when I fell and he thought I broke it.
Y-Your fave food: Chipotle burrito bowl
Z-Zodiac: Libra....ha! They think I am balanced....

Sunday, January 21, 2007

Whups....

faereygirl@sbcglobal.net is my email. I have NO idea where my 'Email Me' link went...I will work on getting it back up!

Friday, January 12, 2007

And the winner is....

InspiredByInk! Girl....drop me an email with your snail mail addy and I will get these wicked cute little stamps in the mail to you ASAP!

Hey everyone, thanks for the rockin' comments on my blog! I just wasn't sure if folks read or not, so this was a pretty good gauge!

I'll post more stuff up soonish!

Monday, January 08, 2007

CC95

I made this card for Color Challenge 95 on SCS. Yeah, it's a week or so late, but better late than never! The windows are made with a Marvy Uchida Mega square punch and some good old fashioned hand cutting on the Cool Carribean layer. I stamped color on color Cool Carribean with the French Flair background stamp. The sentiment is on a tag made with the Cuttlebug and the flower is colored with reinkers and a blender pen, then touched in the center with silver Stickles. Easy Peasy!

Don't forget to look one post below at my Blog Candy give away! :D

Sunday, January 07, 2007

Blog Candy


Well I was at Joann's yesterday and picked up these two wicked cute Valentines Day stamps to give away. Just leave a comment about your favorite Valentines Day just....thing (tradition, memory, etc) and I will choose a winner on Friday January 12th and get these pretty little darlings in the mail to you ASAP.
This is my first time trying this....so I don't know how many folks actually read my blog, but we will see soon! :D

Friday, January 05, 2007

CC93

Wow I haven't done a color challenge in a while! Meh. I made a watermark at the behest of JeanneS. on SplitCoast as well! It's plain, but it does the job!

So anyway, this card is for color challenge 93: Chocolate Chip, Rose Red, Blush Blossom, and Sage Shadow.

I used Chocolate Chip as the base color for this card, then a layer of Blush Blossom that is stamped with the Leaves A La Carte wheel using Chocolate Chip pad ink. There is a layer of Rose Red with another Chocolate Chip piece on top of that and it is stamped with the sprig of flowers from the Carte Postale set using Versamark ink to create a watermark effect.

The main image is colored with Prismacolor pencils and mounted on Rose Red and Sage Shadow. All of the edges are inked with Chocolate Chip pad ink and a sponge bit.

I will try and post more, really. My life just got turned upside down the past few weeks and this weekend will be the first NORMAL weekend that I will have had in a good long time.....*sigh*

Tuesday, December 26, 2006

The Sith Theory

Nothing to do with stamping...

I was thinking today that if Qui-Gon Jinn had not been killed off in Star Wars: The Phantom Menace, that the whole sith thing in Revenge of the Sith would have never happened.

Qui-Gon would have beat the fear of the Force into Anakin Skywalker and would have whipped that wussy (but HAWT) whiney little Sith wanna be into shape.

Peace in the galaxy, balance in the force...but no movies 3, 4, 5, and 6.

Monday, December 25, 2006

TLC96

Merry Christmas everyone! I popped onto SCS after I got home from Christmas dinner at my parents house (yummy yummy....and I love my family so much!) and I saw that there was a Technique challenge up for today. We were supposed to use some wrapping paper from a gift to make a thank you note....here's mine:


The base is Certainly Celery stamped with Mellow Moss using the French Script background stamp. I used the corner ticket punch and punched the corners of a Mellow Moss piece, a piece of the Andrew's Jewelers bag that I recieved today and a piece of Very Vanilla. I inked all th edges and stamped the swirl thingie from Carte Postale on the VV and mirrored it (thanks to notimetostamp for that idea!) in Old Olive. The ribbon is adhered with glue dots and is actually the handle from the gift bag. I punched an oval from the bag and an oval from VV and stamped and inked the edges with Old Olive then stuck it down using two silver brads.

Thats about it...I love the way it turned out though!

Hope that you all have a good rest of the holidays!

Saturday, December 23, 2006

Twas the day before Christmas....

And I did a little work today. Well that and I spent a good deal of time with my DBF, my best friend and her one year old baby. I love that kid, and so does DBF...he likes to play with the kiddo....it is so sweet to see. And this is the man who said to me about a year and a half ago "I don't like kids, I don't want to have any." Ok, truth be told, I felt the same way about that time too, mainly because of the fact that I was with an alcoholic at the time. When DBF started dating a while later, that feeling started to change. I guess it all depends on who you are with. When I was with the wrong person, I didn't want kids. Now I can hardly wait to start trying. Yep, it's that good.


This is another simple thank you note set that I stamped on the SU! pre-cut notecards. I stamped the trees from Lovely As A Tree and then colored them with Prismacolor pencils and used odorless mineral spirits to blend. The sentiment is from TAC, the Trendy Greetings set.


And here is a set using Simply Said. I just love making these little sets. I think they will make a nice little add on to gifts.


And this....is the piece de resistance....a pinecone ball ornament! I think that I need to use longer pins next time because the little pins I got were hard for me to keep my fingers on. If you make one of these....definately use a thimble. My fingers are SORE! but I think this little beauty was well worth it!

Have a wonderful Christmas everyone!

Wednesday, December 20, 2006

Thank you notes

I decided to make thank you note sets to put along with Christmas gifts this year. My mom and brother are always buying them the day after Christmas to use, so I thought I would help them out!

All of the cards are made with pre-cut notecards (I needed to spend $5 on my stamp club order to finish it out this month) from SU! in Whisper White and stamped with Basic Black with the flower from Natural Beauty. The flowers are colored with Prismacolor Pencils and Gamsol. The sentiment is stamped with Basic Black and is from Noteworthy.

Also made with the pre-cut notecards. I stamped the tree from Lovely As A Tree with Always Artichoke and the sentiment from Noteworthy in the same color. I colored the trunk a with a dark brown Prismacolor Pencil.


Tuesday, December 19, 2006

Gift Card Holder Class

Well I am teaching a Gift Card Holder class at Michaels this Saturday morning. I sat down today and planned the cards and pre-cut the paper and ribbon and things, then packed the stamps, pencils, punches, and glue. I think I might be ready for this one.


This card is made with ValuPak CS from Michael's...I have to use what I have in the store to teach with, that way the students can purchase the things we use. The inside of this card is an envelope....yes. An envelope. The CS is cut to 4 1/2 x 5 3/4 and folded in half, then the envelope is glued in. I used a craft knife to cut the envelope down to make the pocket a bit lower so that the gift card can be seen nicely. Then I glued smaller pieces of CS over the inside part of the envelope, kind of like matting, to cover it and to add just a bit more oompf to the inside!

I stamped the snowglobe and the snowman on white CS and colored them in with Rose Art colored pencils then used a ticket punch on the corners and layered it on the green and adhered the whole thing to the front of the envelope/CS contraption. Clear as mud? :D


This is the pocket card from Sketch Challenge 101 over on Splitcoaststampers. Again I used the cheap-o CS from Michaels. The image is by Stampendous and is colored with Rose Art colored pencils. The card stays closed with use of a half of a velcro dot just adhered to the inside.


This is a pocket card that I learned how to do from SCS. Again, Michaels CS, patterned paper, and ribbon. I figured it would be cute to use removable glue dots to hold the gift card onto the insert card.

What do you guys think?


Sunday, December 17, 2006

Some Carte Postale...

Well it has been a while since I have posted, I haven't had alot of time to do anything. Starting this week though, I get to start working normal hours at work (40 hours instead of 55-60), Michael starts his new job (yay! I have seen the TN Visa...he is a LEGAL resident of the U.S. for the next 12 months!!!), so life is going to calm down considerably.


Eventually, I get to knock my hours down at work further so I will have more time to craft and stamp, therefore, there will be more posts on here! :D So the pas few weeks I have also finished most of my Christmas gifts (new sew fleece blanket for grandma and two for my brothers dorm, a scrapbook for my grandmother, and I made a lap quilt for my mom.)...I still need to wrap them all and make the tags.


Anyway....here are a couple of cards that I managed to squeeze in today:

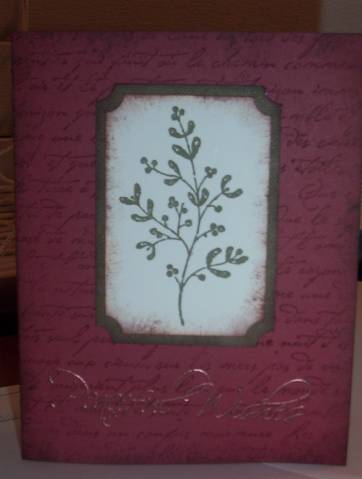
The base of this card is Perfect Plum. On a layer of Pale Plum I stamped French Flair BG with Perfect Plum Classic Ink. I also used Perfect Plum ink to stamp the sentiment in the upper left hand corner. It needed something...so I cut a square of Very Vanilla cardstock and stamped the Fleur De Lis in Sage Shadow ink, DTP inked the edges then mounted it on a piece of Sage Shadow cardstock. It still needed something, so I added a bit of vanilla organdy ribbon and just tied a knot....because I suck at tying bows.


Well the base layer is Rose Red and the next layer is Regal Rose. I stamped the French Flair BG with Rose Red craft ink and sponged the edges with the same. I stamped the sentiment on Whisper White cardstock and sponged the edges, then used the handheld punch from Michaels to make the slits. Then I threaded white organdy ribbon through and tied them in knots and glued it all down with Mono Multi. It still needed something, so I stamped the bird from Carte Postale on Whisper White with Rose Red craft ink and cut it out, then mounted it with a dimensional and glue dots. I added a bit of shimmer with a Sakura clear Stardust pen.

Monday, December 04, 2006

Let's talk about life for a moment

It's called War-Scrapping. :D

I was re-reading some of my older blog posts and remembering the 8x8 scrapbook that I did for my cousin's wedding a few months back. I pre-made the whole thing and took pictures at the wedding, had them printed in about 5 minutes at Walgreens, and popped them onto the mats in the scrapbook while on the way to the reception.

My grandpa was my get-away driver, if you will.

A month later I was out with my brother and he was using his Apple PowerBook on the way and had internet connection because he was picking up wireless from houses along the way....he calls it War-Driving. I dunno why....

So I call what I did....War-scrapping.

Stupid thought for the day. :D

Sunday, December 03, 2006

Stamp table cleaning and then....stamping!

Well...I think that I am in LOVE with this Peaceful Wishes set. I had it in my head this morning that I was going to make some cards. We got up late and Michael made bacon and eggs while I cleaned and organized the stamping table, then, I got to work...

This card is using the colors for CC90 on SCS this past Tuesday. A card by WAXYO inspired me, but I stared working....and changed it up. The base is True Thyme stamped with True Thyme ink with the pine stamp from Peaceful Wishes. The next layer is Cranberry Crisp with the edges distressed using the distresser from the Making Memories Distressing Kit. The nex layer is Blush Blossom stamped with Blush Blossom and the pinecone stamp from Peaceful Wishes. Edges were also distressed and I layered both pieces with Mono Multi Adhesive.

And finally....The last layer is stamped on Whisper White with True Thyme ink. I dabbed the berried off with a baby wipe and used a red marker to ink those. Huffed and stamped the image. I distressed the edges with the MM Distresser before mounting as well.

I stared at the card a long while and realised that it needed something. So I inked up the sentiment with True Thyme ink and plonked it onto the side.

I did another one too, but I will post that one tommorrow!


Thursday, November 30, 2006

Fan Boys!!!

http://www.worstpreviews.com/review.php?id=650

OMG! I know this has nothing to do with craftiness, but I saw this trailer when I rented Clerks II the other day....and I about DIED laughing.

I know...I am a die-hard Star Wars Geek.

I need Star Wars stamps. O.O

Thursday, November 23, 2006

Thanksgiving Day Stamping

I kinda had to use acrylic blocks to keep this one standing and closed so that it could be seen properly! That makes the photo quality a little crummy...but I plan on getting one of those cute little stands tommorrow at Michaels so that I won't have this problem anymore!

This card measures 4.25"x4.25" and is folded about half inch short of being even. I punched half of a 1" circle in the top edge of the card, stamped the love stamp from Riveting on Whisper White CS and punched it before lining it up with th punched circle and adhering it to the card.

The background is stamped with Pink Passion and Versamark inks using stamps from the Simply Said stamp set. Then I stamped the flowers from Simply Said and water colored them using Pink Passion, Perfect Plum, Green Galore and Ruby Red inks. Layered this onto Perfect Plum and adhered both to the card. Added some touches on the flowers with Sakura Clear Stardust pen. Viola. Done. Cute.

Monday, November 20, 2006

Is that....mojo...?


Is that my mojo that I see coming back? I don't know...I don't want to jinx it with getting all excited. So...this card....is made with my new Peaceful Wishes stamp set and French Script BG. (My DBF and I joked that I broke in three virgin stamps this weekend!)

I stamped French Script BG with Cranberry Crisp ink on Cranberry Crisp paper and then inked the edges with Chocolate Chip. Stamped Linen BG with True Thyme ink on True Tyme paper and inked the edges with Chocolate Chip. Stamped the sprig with True Thyme on Whisper White CS and inked the edges with....wait for it....Chocolate Chip AND Creamy Caramel. The corners are punched with SU's ticket corner punch (innit just rockin'?) and stuck together with the miracle in a little green and white bottle...Mono Multi.

After all the layers were put together....it still needed something so I busted out some Versamark and Classy Copper EP then stamped and embossed the Peaceful Wishes sentiment.

Whoot! It's the inspiration fairy hitting again!

Saturday, November 18, 2006

Stuff I did today....

I got a little uppity today and did some stuff....went to Michaels and got some glass ornaments, then went to Home Depot and bought a glass block and a diamond drill bit...


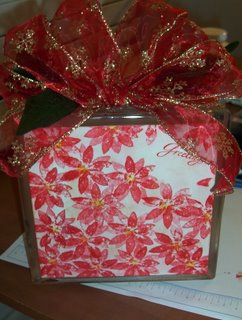
Dad used his drill press and the new diamond drill bit to drill a half inch hole in the back. I washed it and let it dry. While that was going on, I sat down and used the large flower from Paint Prints with Ruby Red ink. I stamped the flower once, turned it 1/4 turn and stamped again before re-inking to make the poinsettas. Then I used the small dots from Paint Prints with Summer Sun ink to make the centers. I also stamped the Seasons Greetings stamp from Sincere Salutations in Ruby Red. I took a sponge and inked the edges and some of the stark white spots on the CS with Creamy Caramel.


I spread Mod Podge all over the back of the CS and attached it to the front of the block, then smoothed more MP over the top to seal it on and press the air bubbles out. I stuffed a string of 20 Christmas lights into the hole in the back, then wrapped the block in wide ribbon and hot glued the (jerry rigged) bow down to the top. Viola! It's so pretty when lit, but the picture turned out crap!


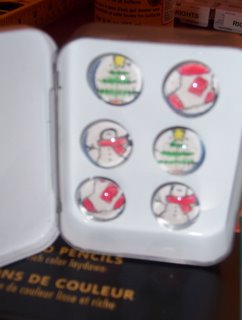
Aren't these the darndest things?! I stamped the stocking, snowman, and Christmas Tree from Little Somethings onto plain white CS and colored them. Then I punched them with a half inch circle punch and used Judikins Diamond Glaze to adhere them to the backs of flat glass marbles. Then I put a small round magnet on that and adhered it with the DG again. I stuck them in this Altoid tin as a set and will get around to covering it soon to make it a cute matchy matchy set!


Re-inker onaments. Well...they didn't turn out as well as I had hoped. I did get the hang of it with the last few . I put a few drops of re-inker in the ball and a few drops of water before swirling it around inside. I dumped out the excess water and ink then poured a fine clear glitter into the ball and swished it around to coat evenly. Some of them are kinda stripey, some clumpy....I need some advice on these! I want to make some before the craft show in a couple weeks! I used Crandberry Crisp, Buckaroo Blue, and True Thyme on these ones.
Tuesday, November 14, 2006

An oldie but goodie

Well, sorry for the lack of updates recently, but life has been pretty crummy the past few days. It'll get better, it has to....soon. It will. Ah. The power of positive thinking. :D


So I made this card a while back. I like it though. The stems are inked with a geen marker and the petals with a purple marker. I think the only stampin' Up! thing that I used on this card was this flower from the Art of Life set.
So I inked up the flower and stamped it a few times and thought, "hey, you should distress that a bit." So I busted out my handy Making Memories distressing kit and went to town. The 'primas' are also by Making Memories, and they were white. I smudged them against a violet ink pad and then attempted to dry them with my heat gun.
After melting a hole through my embellishment case...I realised that I charred the flowers. Go me!!! Burnt primas on the menu for tonight! I put em on there anyway...they didn't look too bad after all.
Added some hardware and a bit of leftover bridal ribbon and ping. Done. Burning flowers aside, I think the whole card took me 20 minutes....it took much longer to get the burnt flower smell out of my apartment. ;)

Tuesday, November 07, 2006

Well...

Hey everyone! I thought that I would leave the folding tutorial near the top a while so that everyone could check it out. I got some nice comments and one person asking if we could chat about my stamping slump! So....I a link to send me an email message up on my profile for anyone who just wants to chat...or send a note....or to fling some encouragement my way!

Thanks everyone!

Oh....new post in the next couple of days...I think I might do a contest. Still thinking on that though!

Tuesday, October 31, 2006

Gift Card Holder Tutorial

***Please note....this is NOT my pattern. I have no idea where it came from, someone else taught me how to do this. I have found similar patterns on the internet for a similar card though!***


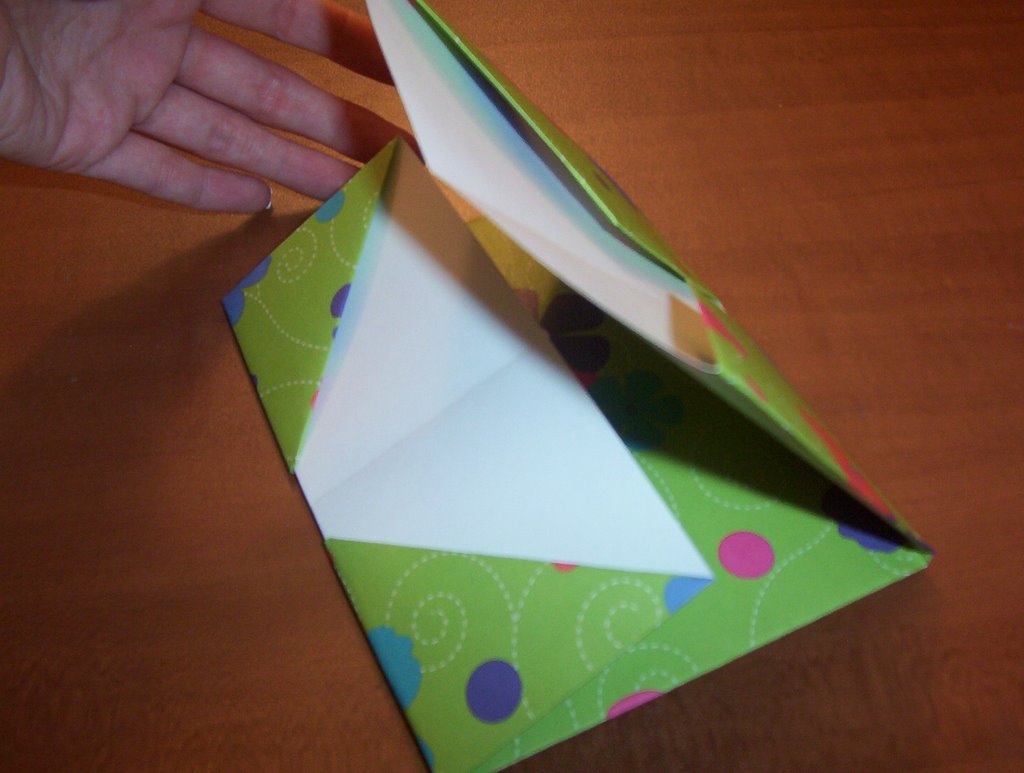
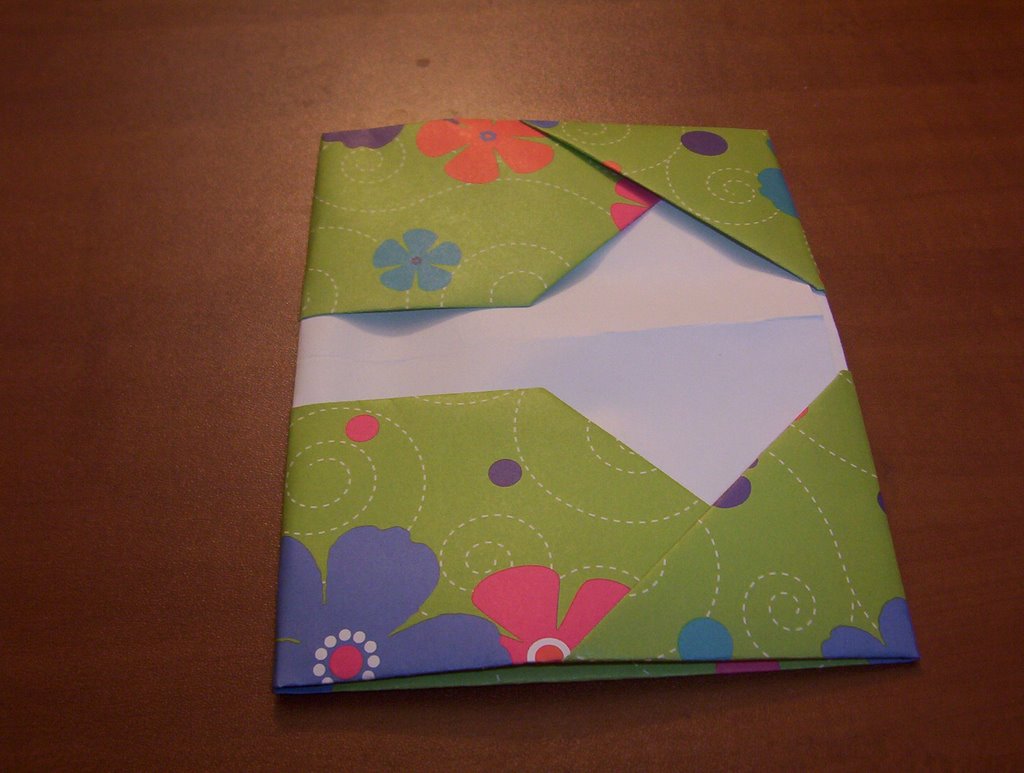
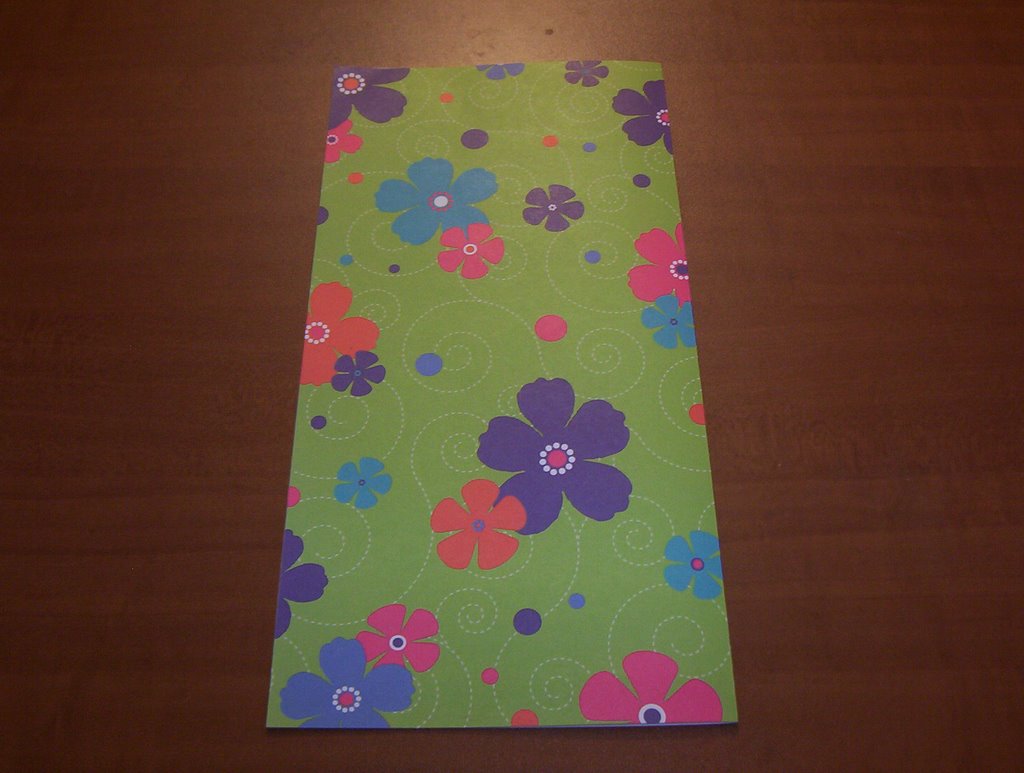
First, start with a sheet of 12x12 paper (Stampin' Up!'s 12x12 double sided paper is fabulous for this.

Fold the sheet in half and crease with your bone folder. The pattern that is on the outside of this fold will be the pattern on the outisde of your gift card holder.


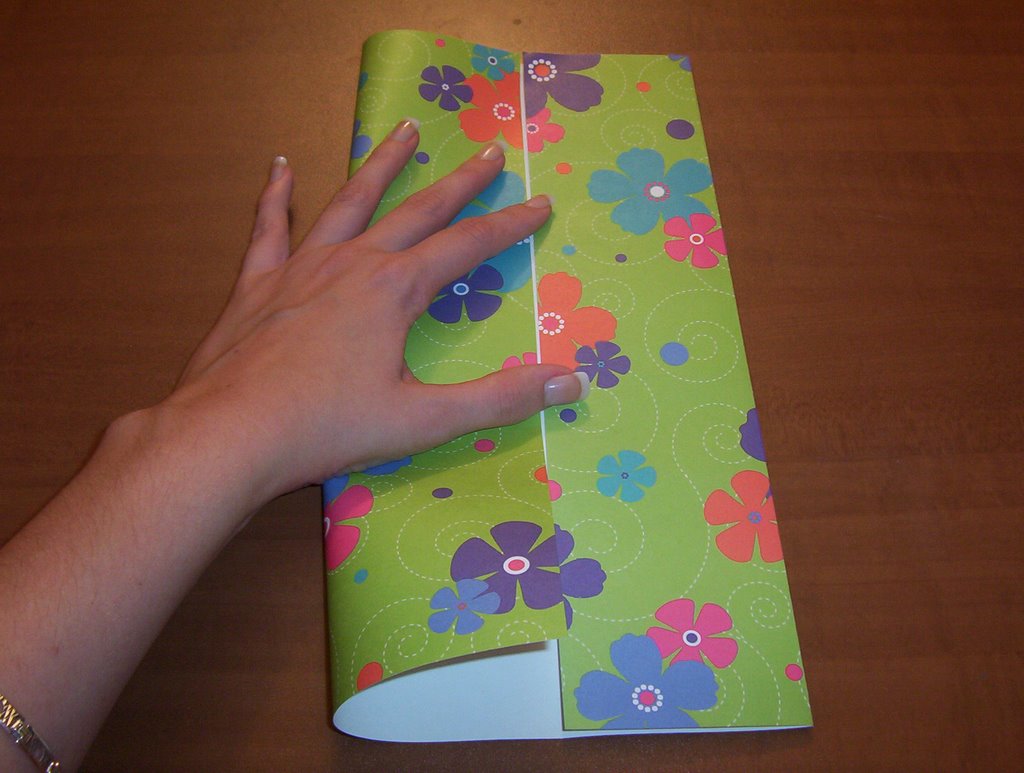
Next, open the paper back up and fold the edges in to meet the middle, crease with your bone folder.

Open these back up and you will have three creases in your paper.


See the creases? I know, the pic makes it a bit difficult. Take the edges and fold in about 1/4"....this does not have to be perfect! Crease with a bone folder.

Then fold the corners in to meet the first set of creases and crease. (I hope this is making sense!)


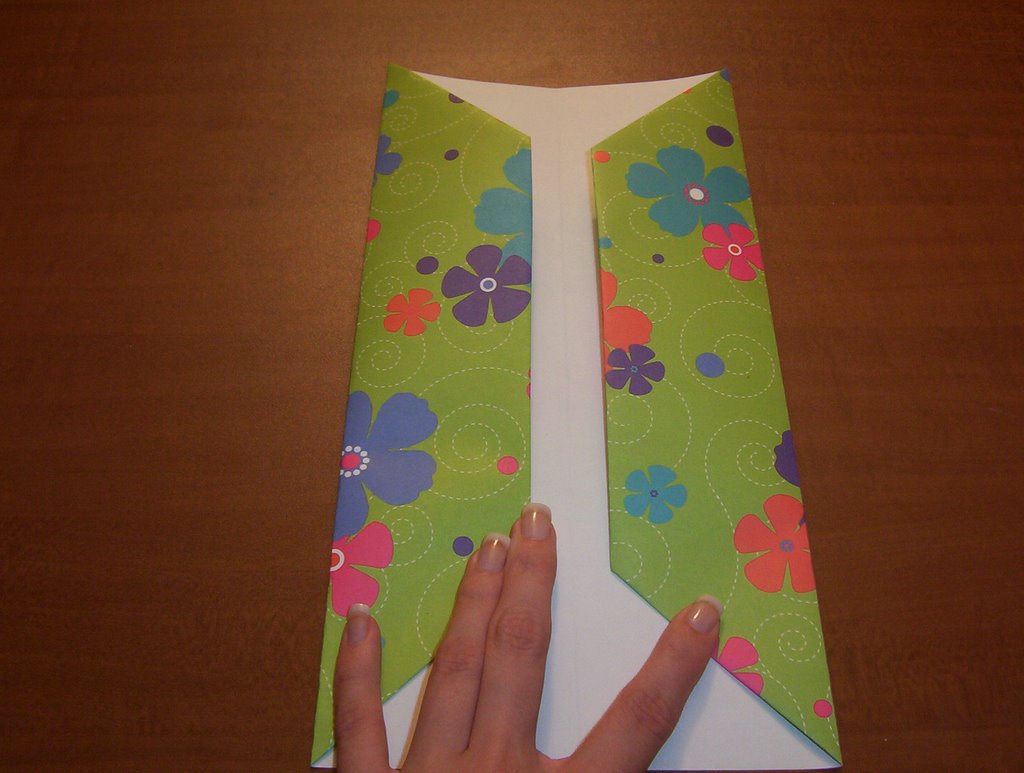
Next, leaving the corners folded in, fold the sides in to meet the middle again. Easy peasy!


Flip the paper over (keeping it all folded), and fold one end down to the end of where the corners are folded in. Yes...I hope the picture helps you, I am so not good at explaining this!


Flip over again (Keeping everything folded) and fold the other end to meet the folded end neatly.


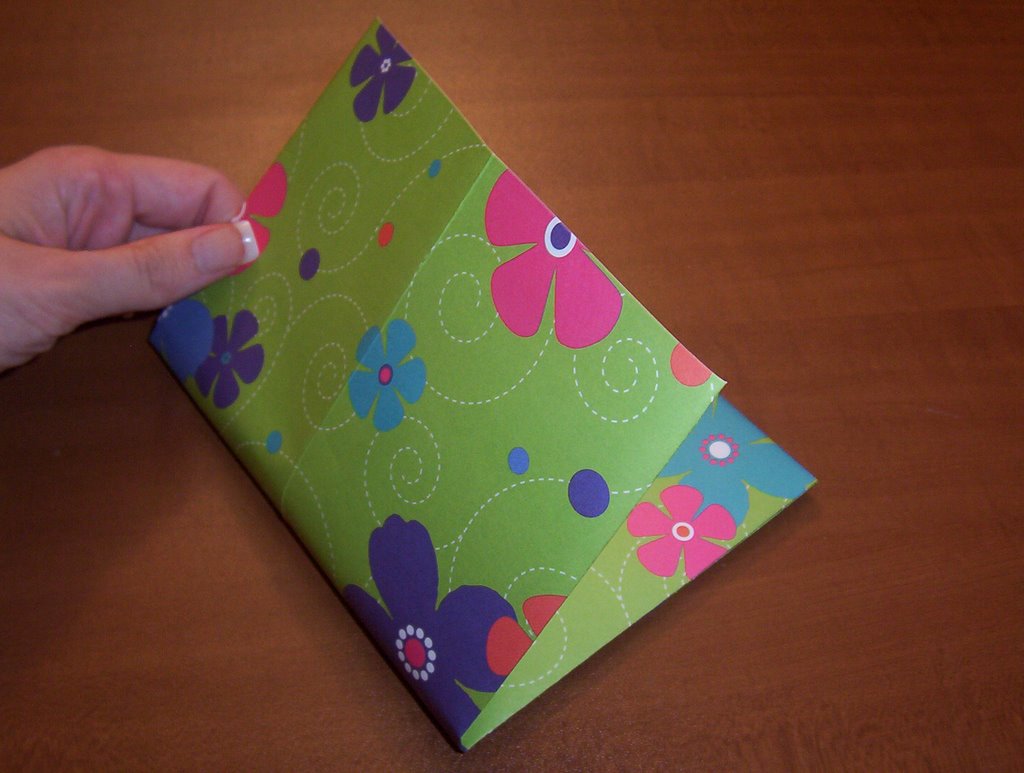
Fold the paper back over and flip the larger part over to meet the smaller. Crease them well!


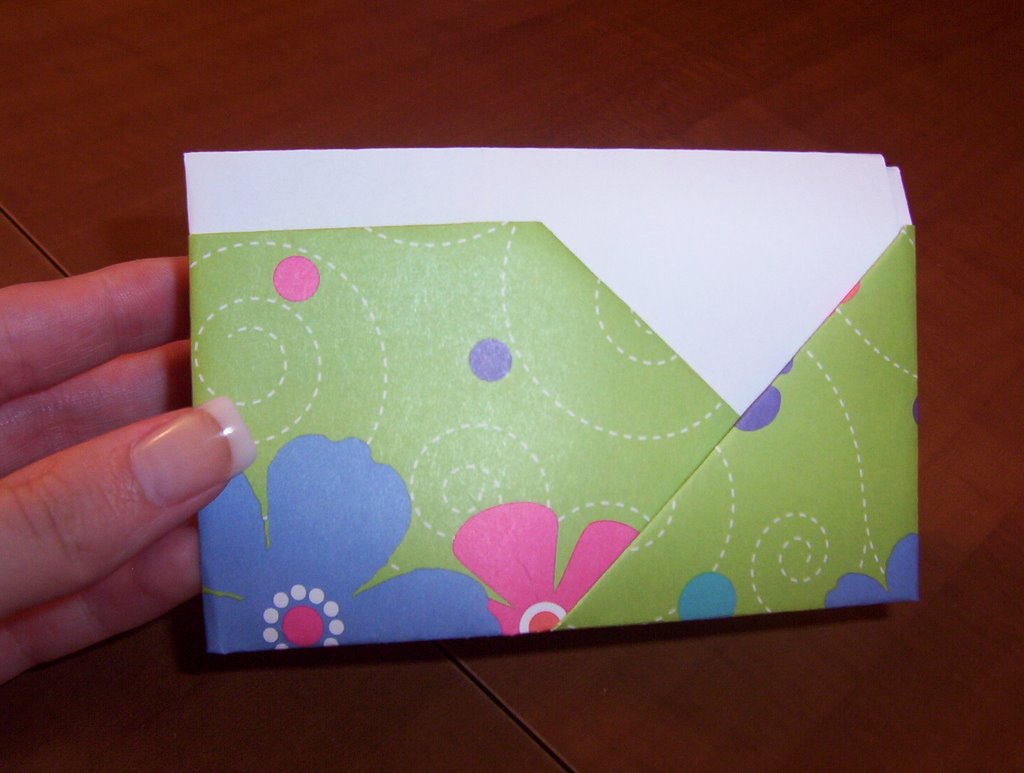
Alright, tuck the big end into the little end and....voila! Almost done! You're almost there, don't give up now!


Fold the card in half and you're done! There are 4 spots to put a gift card or small sentiment cards....or whatever you want. I use a small bit of ribbon to tie mine closed!

Gifting myself

So my friend Leli suggested buying myself a gift in the hopes that it would bring my stamping drive back. I think she just wants to get more pretties in the mail.

So I bought this super cute tote from Michaels! I only ended up paying $13 and I had purchased a few other things. Thank goodness for the employee discount (though I looked at my reciept on Sunday and realised that I got 50% off everything that I purchased!)....and apparently last week employee discount was....well anyway....I found out just in time apparently.

I also ended up buying a few different 12x12 patterned papers and some more silver eyelets. I realised that I only had two silver eyelets! How can one go on without silver eyelets?!?! Anyway...I think that I will need them for my class next week, if I get any students *crossing my fingers and hoping to everything that is listening*.

I plan on teaching a unique cards class next week...a folded gift card holder (which is posted in my gallery and people went APE over), a pocket card, and a waterfall card. I set my demo samples out today so hopefully they will attract some attention. And for those who liked the folded card, I am going to try and post directions up here one day this week. It's really not as hard as it looks....I promise! ;)

ETA: I changed the settings so that people other than just blogger members could comment...so please do! And enjoy!

Sunday, October 29, 2006

Stamping with Jen

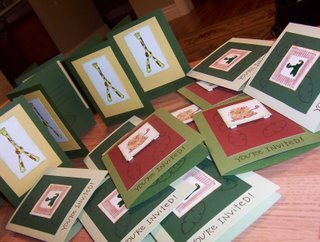
We made 16 cards yesterday for her son's 1st birthday party invitations! It was tedious and took 3 hours because Jen had never stamped before but we had a good time and got them all done in the end!

These are all made with a Bazzil Basics monochromatic textured carstock pack, white cardstock from TAC, Wild Animals stamp set from TAC, You're invited stamp set from TAC, and Pallette Hybird inks. Looks impressive to me. And at the Halloween party she showed EVERYONE the cards!


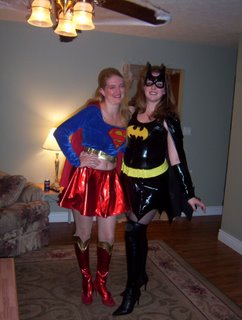
And yes....that is her and I...SuperGirl and BatGirl!

Friday, October 27, 2006

Hum.

Well...in an effort to get re-aquainted with stamping and cardmaking and the likes, I am going to try to post here more often. As such, I joined the Stampers Top 50 site to get my blog out there a bit more and I was toying with the idea of doing some sort of give away to see about getting people reading. Personally, I peruse about 50 blogs a day (no, I don't have a life or children....it is just something I do between patients and when I am relaxing in the evening), and enjoy every single moment of it.

I realise (and BOY do I realise) that I am not the -best- stamper on SCS but I am trying and when I have the inspiration and am not in a slump, I love to stamp and make cards! That is all that matters!

It doesn't matter if you are the best, all that matters is if you love doing it. Someone on SCS said that today and it made a hella great deal of sense.

I was going to post a card, but well, Blogger was being mean and wouldn't let me. I am sure that one day this site will learn that resistance is futile....

Wednesday, October 25, 2006

Stamp Club

So I made the decision to switch Stampin' Up! demos. It took me about three months to make the decision, but I finally did it. I just decided that I wanted a little more hands on with my demo and a little less pressure to do a party. My old demo wanted me to do a party and I wasn't really up for it, but I felt bad about not doing it! I don't have alot of friends that stamp and untill last night, I had never stamped with other people.

I went to the stamp club meeting, which was 5 minutes from me (rather than the hour round trip just to pick up stamps with the previous demo). I got there a few minutes early because it was dark and I wasn't -exactly- sure where I was going. The demo was really nice and very welcoming and her home is absolutely BEAUTIFUL.

So I sat down and we chatted a few moments and then the rest of the ladies came in and the demo introduced me to them. I felt weird...I feel weird meeting new people and I get really nervous and stutter like a moron. On top of that fact, I have a horrible cold sore that is making me look like a leper...so I felt even more freakish. They were all incredibly nice though, cold sore or not.

We made two projects. This was a new concept for me...seeing as how I am a pretty much self taught stamper. Stamping with others is FUN too! We chatted and cracked jokes and had snacks (oh I need that veggie pizza recipie.....yum).


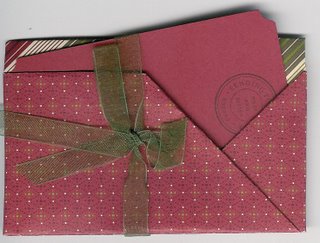
This is the first. It is a gift card holder made from a 12x12 sheet of the double sided paper from the Holiday Mini. No cuts, only folds. I am hoping to be able to reproduce it for a class I am going to teach at Michael's...but we will see when I try it on my own tonight. We inserted small corrdinating cards which I stamped with Circle of Friendship. Some of the ladies did snowflakes, but I really was feeling this cranberry color!


This is the second one. My apologies for the crooked scan...but the durn thing just WOULD NOT stay still on the scanner bed. I will try and photograph it this evening and then repost it. This is an accordian fold card. The inside (not shown, obviously) is a piece of cardstock slightly smaller than the outside of the card itself. It is folded into an accordian shape every 1" and glued to the front and back cover. The outside is Always Artichoke, Cranberry Crisp, Creamy Caramel, and confetti kraft all edged with a sponge and Chocolate Chip ink. The image is from Always On My Mind. I am not sure what set the sentiment is from though.

All in all...loved stamp club. I can't wait untill next month to go and spend time with these ladies again and stamp some more cool things. In fact, my demo invited me to do a couple of her stamp camps if I am so inclined to do so...I think I will...it sounds like a ton of fun to me. The one thing that stamp club did do to me....was it made me regret unmounting my SU stamps. I miss the wood. I miss it alot. I might go home and re-wood mount everything (my boyfriend will KILL me) so that I can use it more often. I stamped more before I went totally unmounted. I wonder if that is the problem? Meh. ;)

Sunday, October 22, 2006

Cricut Review

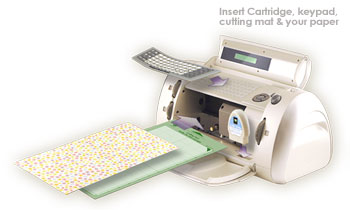
Well. I got to use the Cricut for the first time at Michael's this weekend. I demoed it for two hours and spent that ENTIRE time just cutting out words and shapes for the demo scrapbook I am doing for my class next month. Thought I would do a review of the chirpy little thing!

First...it's compact and portable. Very light and easy to carry by it's handle if you don't have the nifty little case for it. I plugged it in and pushed the on button...it was like the Starship Enterprise opening up! Fab! The warmup time is minimal and the Cricut is ready to go in a matter of seconds.

Unfortunately I didn't have the instructions and I had never seen one of these bad boys in action, so it was a guessing game after that. Luckily the little display screen had step by step instructions on it! I, however, was unaware that you needed to stick you paper to a cutting mat BEFORE putting it in the machine! Whoot! So 8 sheets of paper later, I finally figure it out. My EC at Michael's didn't leave them out with the machine, so I was clueless.

Stick paper to cutting mat, load paper. After that it's cake work. Type in the letters you want, make sure you spelled it RIGHT, select cutting style and size, press cut. Simple as that.

Once you unload the paper, you have to carefully peel the paper from the mat because the mat is slightly sticky. It is a bit tricky but it comes up. I found a couple of the tools in the Cricut Tool Kit to be hella helpful with that.

When I was finished with the two hours of demoing, I had a huge stack of die cut things...nothing to do with them...but a huge stack of them. It's a pretty nifty machine, but I honestly cannot say that I would spend the $300 to purchase it. I don't use die cuts that much, and if I need one I can always just bop into the classroom and use theirs!

Sunday, October 15, 2006

Been a busy week

I have been a hella bad poster. I guess when I have nothing to post about....I don't post. I haven't made any cards aside from the ones at my card class on Thursday and I gave those to my students to take home with them.

I am in a stamping slump....it's bad this time too...I ordered $80 worth of new stamps on Thursday and I am not even excited about them. :( Or my SU stamp club order for the month....ugh.

Someone beat me out of this.

Sunday, October 08, 2006

A day at the zoo

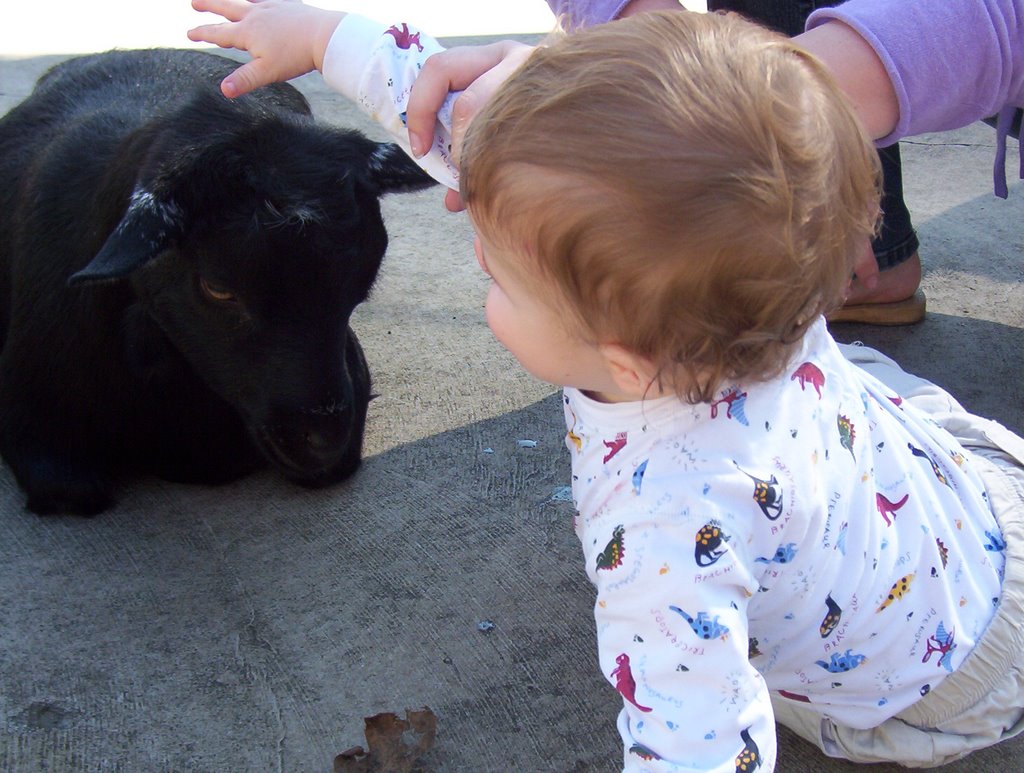
Well we went to the zoo today with Jen, AJ, and the baby Cole. Cole liked the goats, that is for sure....he drooled on the goats and the goats drooled back.

In other news....I got my Fabriano paper today....beautiful stuff. I haven't stamped on it yet because I am just not in the mood at all to stamp. I also got two Souffle pens....not impressed. I dunno...maybe it is just my stamping funk.

Wednesday, October 04, 2006

My Birthday Card


He made me a card for my birthday. *tear* So sweet....he tried so hard and that Crop A Dile whooped his butt in the end. *sniffle*